Looking for a fun and creative DIY project? Whether you’re making a birthday card, a surprise gift, or just want to create something unique for someone special, this Peekaboo Card is the perfect idea! It’s handmade, personal, and super easy to make with just a few craft supplies. In this blog post, I’ll walk you through how to make a Peekaboo Card step-by-step – with tips to fix common mistakes too!

✂️ Materials You’ll Need To Make Peekaboo Card :
To get started, gather these simple craft materials:
- Cardboard
- Paper
- Glue
- Double-sided tape
- Scissors
- Craft blade
- Scoring tool (or something with a blunt edge)
- Ruler
- Pencil and eraser
- Sketch pens or markers
That’s it! You probably already have most of these at home.
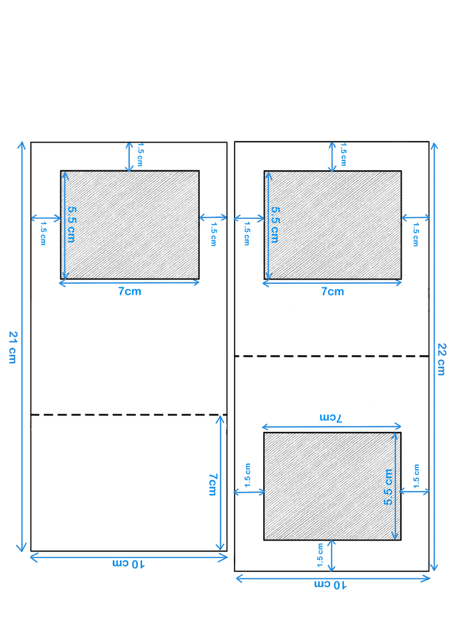
📐 Step 1: Draw, Cut & Score the Template
Begin by drawing your card template on cardboard and paper. If drawing isn’t your thing, don’t worry – I’ve got you covered! You can download the full template from below.
Once the template is ready, carefully cut out the shapes and score along the fold lines. Scoring helps your folds look clean and professional, so take your time with this part.
🎨 Step 2: Decorate Your Peekaboo Card
Now comes the fun part – designing your card! Grab your sketch pens, markers, stickers, or whatever you like, and decorate the outer and inner parts of the card. This is where you can really get creative and make it your own.
🧩 Step 3: Fold and Assemble the Card
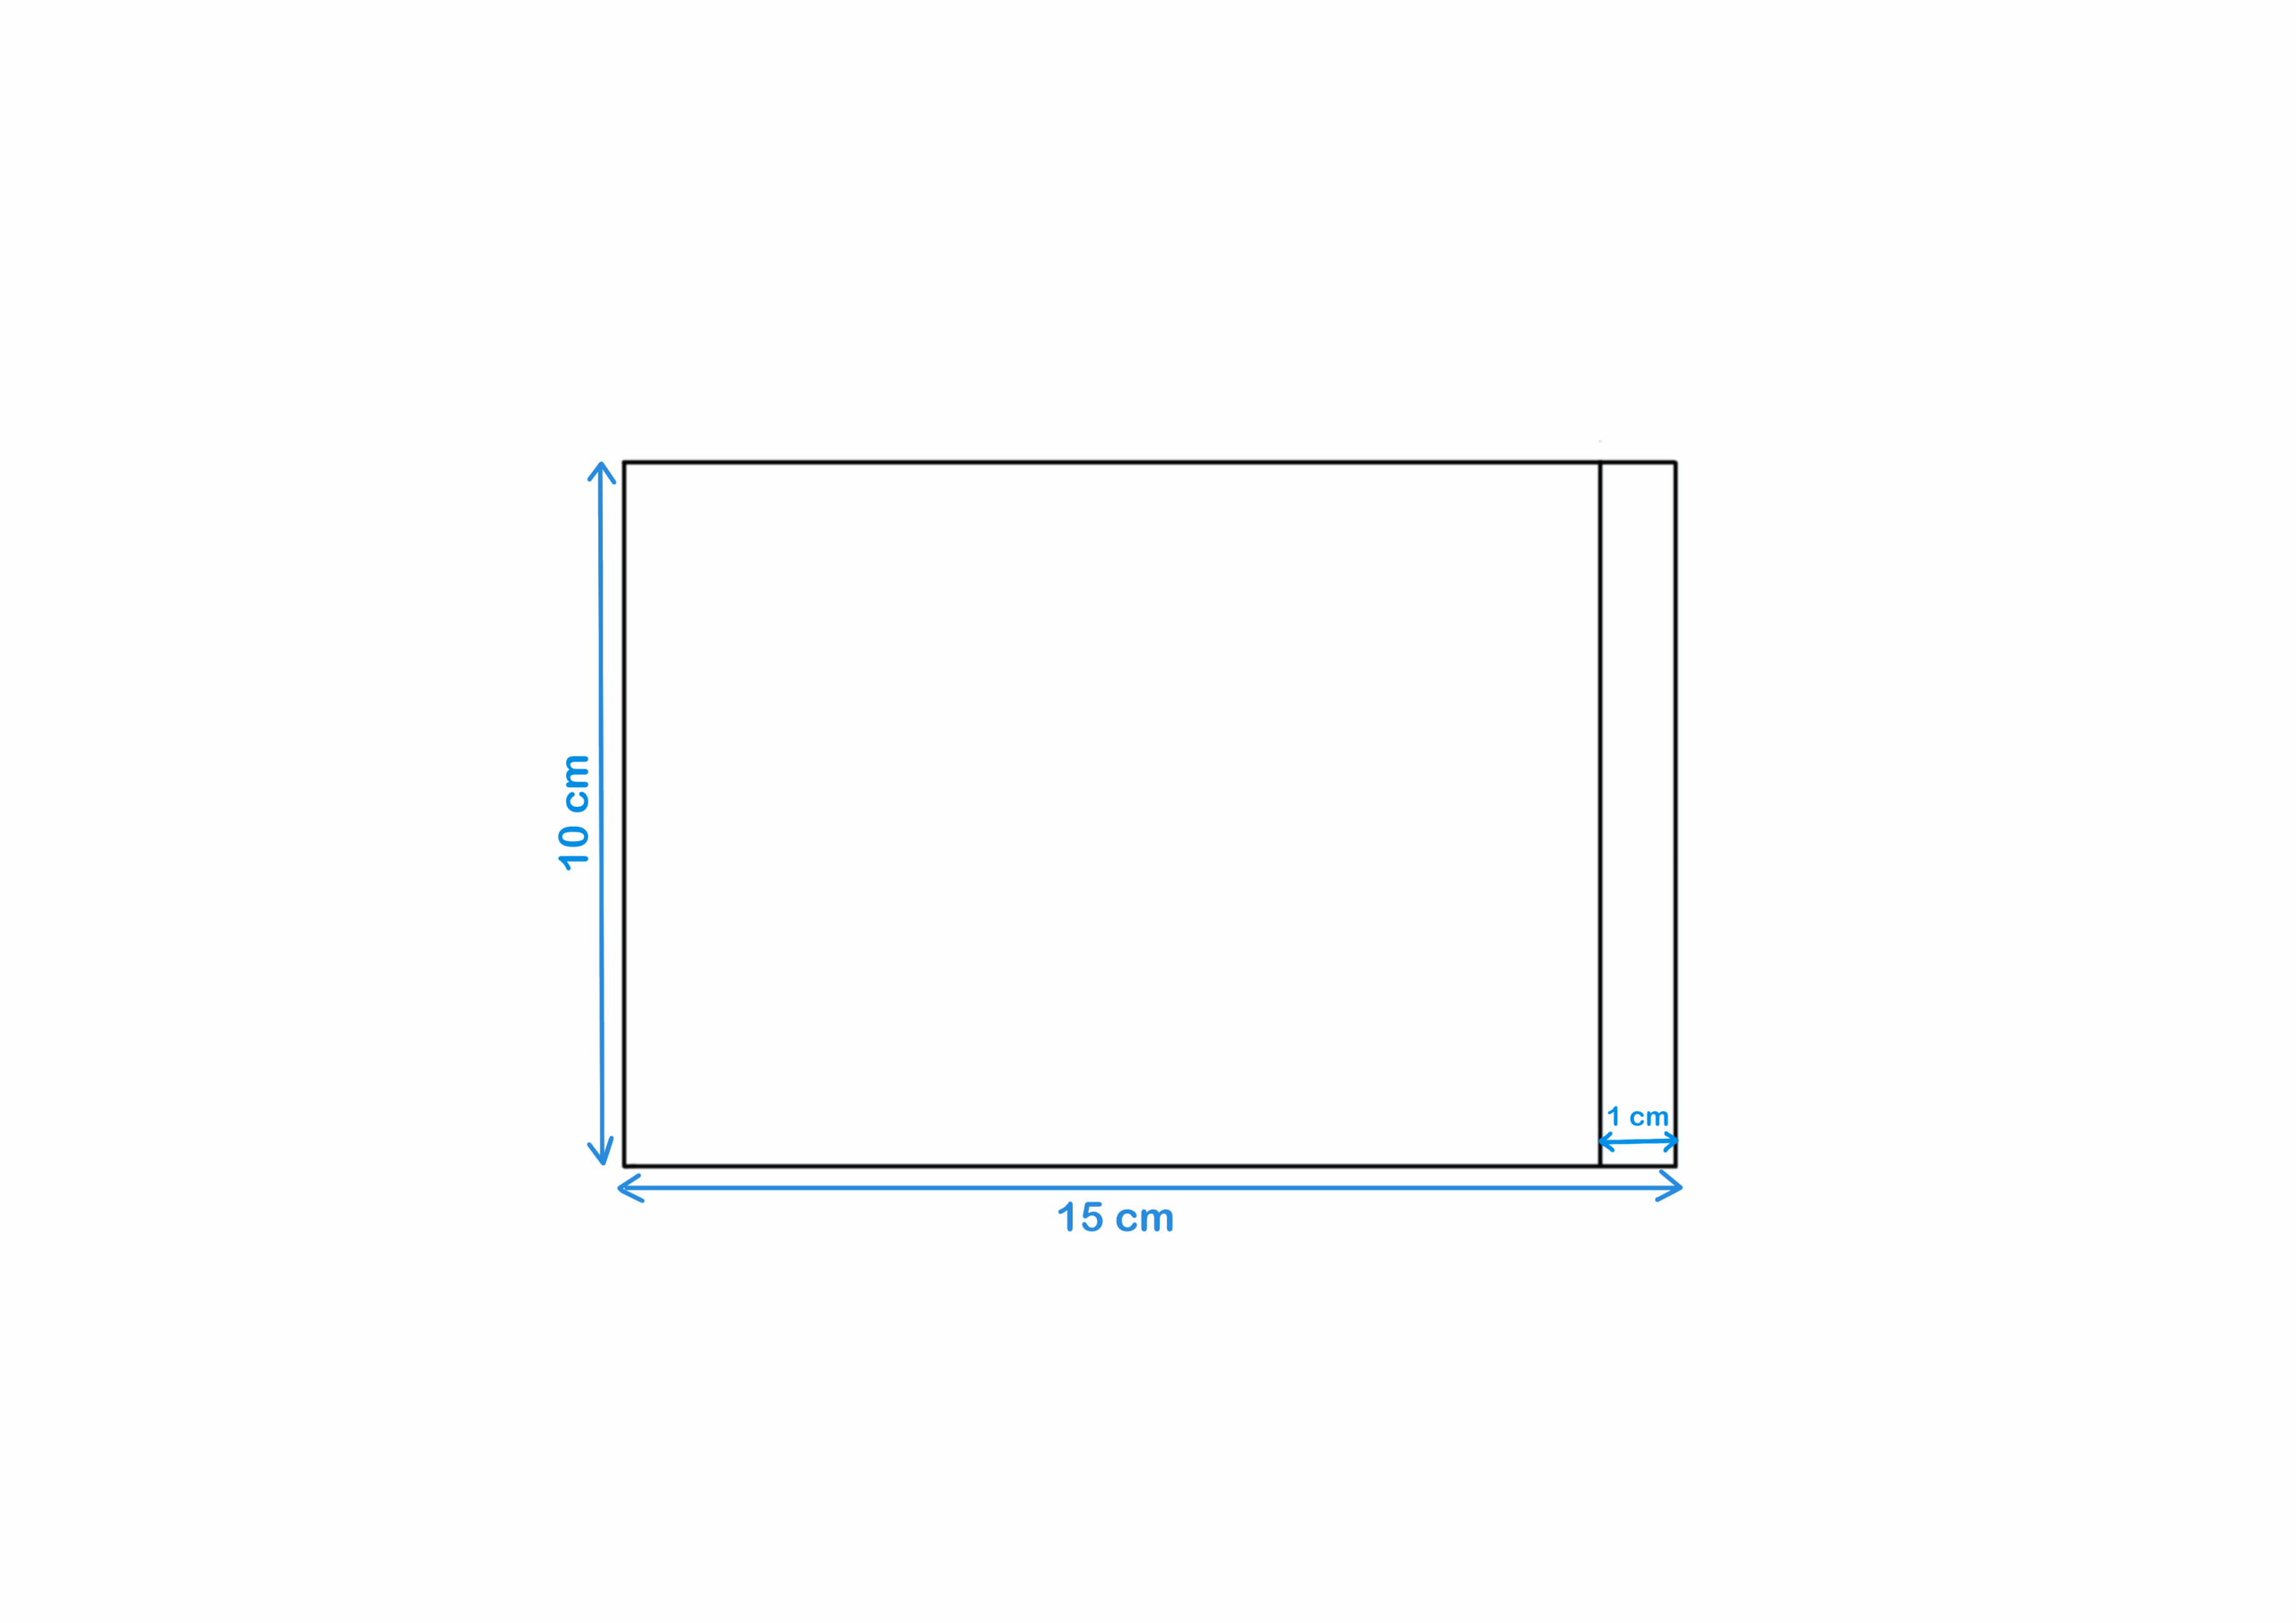
Start folding along the score lines you made earlier. Then, apply double-sided tape or glue on Template 2 – specifically on the edge with the 1 cm score line. Do the same for Template 3, applying adhesive to the back left side.
Carefully assemble the pieces:
- Stick Template 3 onto Template 1.
- Then, stick Template 2 onto Template 3.
Your card base is now ready!
📸 Step 4: Add Photos for the Peekaboo Effect
This is what makes the card so special. Take your printed photos, apply double-sided tape or glue to the back, and align them neatly near the peekaboo window.
But here’s a quick tip from my personal experience – if your fingers get stuck in the tape and mess up the alignment (like mine did 😅), don’t panic! Gently use a blade to lift the photo. Be careful though, the paper can tear easily.
To avoid this in the future, I used painter’s tape to temporarily mark the right spot, aligned the photo, and then stuck it down perfectly. Easy fix!
🎉 Your Peekaboo Card is Ready!
And that’s it – your DIY Peekaboo Card is all done! It’s a thoughtful and handmade card that’s guaranteed to bring a smile to anyone’s face.
👉 Want to see the full process in action?
Watch the step-by-step tutorial on our YouTube channel – it’s linked below! Sometimes seeing it visually just makes everything easier to follow.
💌 Final Thoughts
This card is great for any occasion – birthdays, anniversaries, Valentine’s Day, or even just a simple “thinking of you.” Plus, it’s so customizable and fun to make. Don’t forget to download the template and give it a try!
If you loved this, be sure to share it, save it, or tag me with your creations. I’d love to see what you come up with!
☆ SOCIAL MEDIA ☆
- TikTok – https://vm.tiktok.com/nK1eyo/
- YouTube – https://www.youtube.com/c/CraftNCanvas?sub_confirmation=1
- Instagram – https://www.instagram.com/craftncanvas.cnc/
- Facebook – https://www.facebook.com/craftncanvas.cnc/
